Introduction
Designing an aquarium shouldn’t be difficult, yet many aquascapers end up dropping in a few rocks, a plastic pirate ship, and a single plant hiding at the back.
With a little planning, you can build a gorgeous landscape that’s not only easy on the eyes but—more importantly—a healthy habitat for your fish.
What tank should I choose?
The first step, of course, is the tank itself. While quirky shapes can be tempting, a standard rectangular aquarium is usually the safest bet.
Spheres quickly become a maintenance nightmare, and anything with lots of curves is harder to plan—and can distort the view through the glass.
The size is up to you, but make sure it’s large enough for the fish you intend to keep. Counterintuitively, a larger tank is often easier to maintain. (Check out our guide on tank maintenance.)
What do I need to design an aquarium?
Once you’ve assembled all your tank basics, you’ll need a few extras to design and plan your layout.
1. Substrate
You may need two types, depending on your plants. Choose a color that contrasts nicely with the greenery.
A pale, sandy substrate is often a safe choice. You might also add aquascape soil to supply nutrients and keep plants thriving.
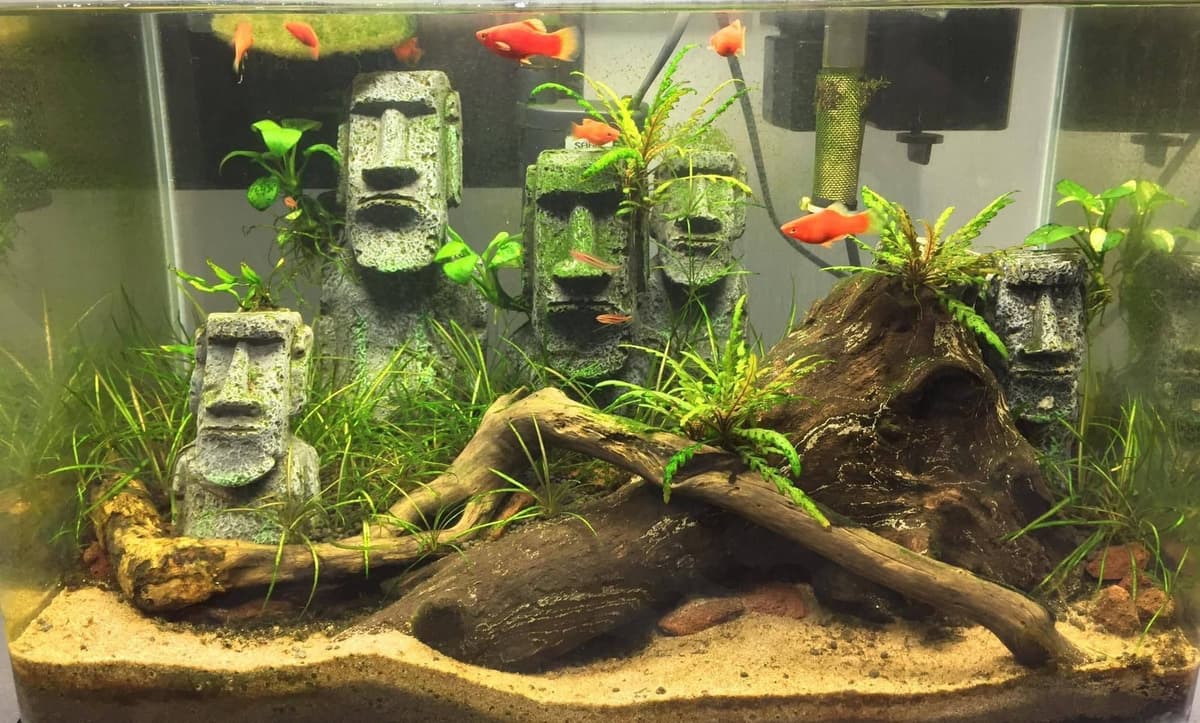
2. Hardscape
Hardscape covers the decorations you place in the tank: rocks, pebbles, and wood. Look for a mix of shapes and sizes.
You can even collect pieces from your garden—just be sure to clean them thoroughly first to remove tannins and dirt.
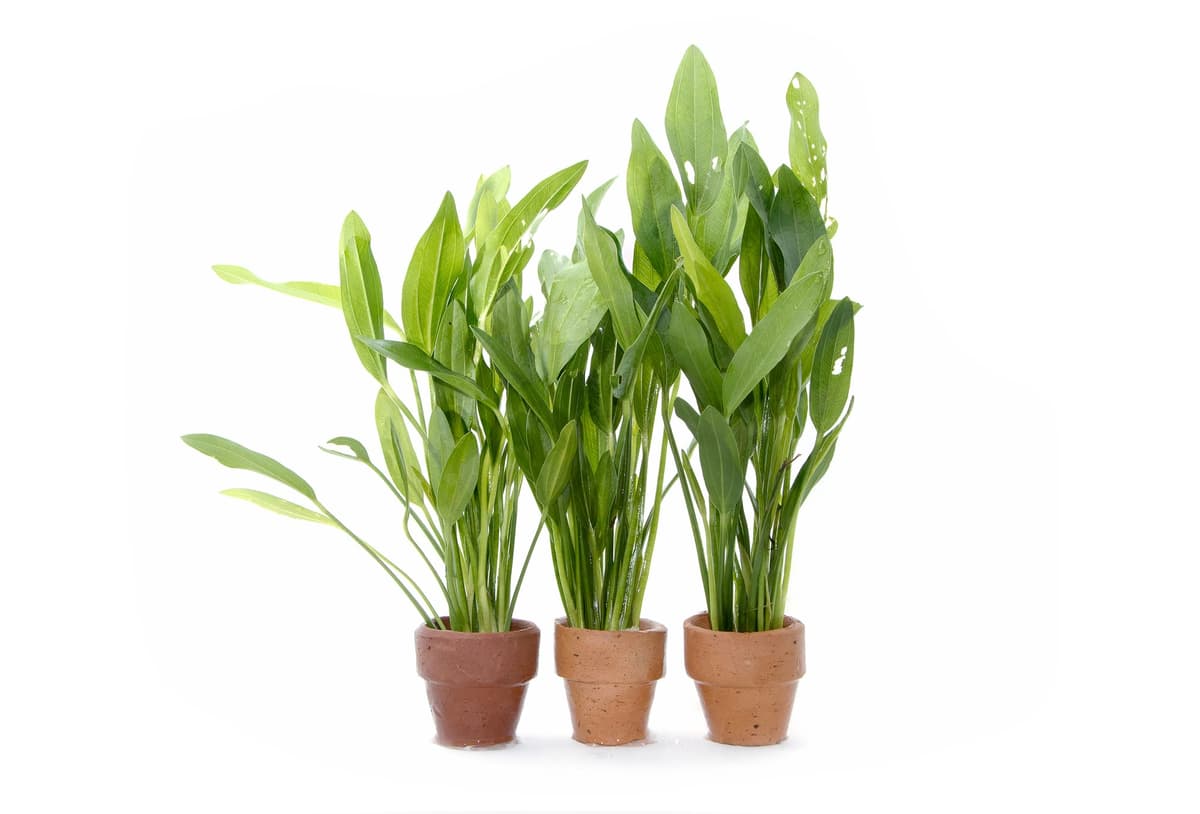
3. Plants
My favorite part of any aquarium! Buy a mix of foreground and background plants (small to tall).
If this is your first tank, stick to easy-to-grow options.
4. Planting tools
Optional, but handy. Long tweezers help you push roots deep into the substrate without disturbing your layout.
5. Fish-safe super glue
Epiphytes like Anubias and moss grow on hardscape and look fantastic. Keep them from floating off by gluing—or tying—them to rocks and wood with fish-safe glue, string, or wire.
Should I choose fish before I design my aquarium?
It isn’t essential, but having a rough idea helps. For instance, goldfish or a common pleco can nibble plants if underfed, so plan accordingly.
Some fish prefer open water, while others like to hide among plants and hardscape.
Most beginner-friendly fish will be content with almost any well-planned design.
So how do I design my aquarium?
Before buying heaps of plants and hardscape, map out what you want.
Once you know the tank you’ll use, resist the urge to impulse-buy. A little patience now saves a lot of hassle later.
Pen & paper
You can’t beat a quick sketch to visualize your hardscape and planting scheme.
It’s tough, though, to judge the final look until you build the real thing.
3D software
If you have AutoCAD or SketchUp skills, mock up your tank in 3D and shuffle items around until you’re happy.
It takes longer, but you’ll get a true sense of how everything should be laid out.
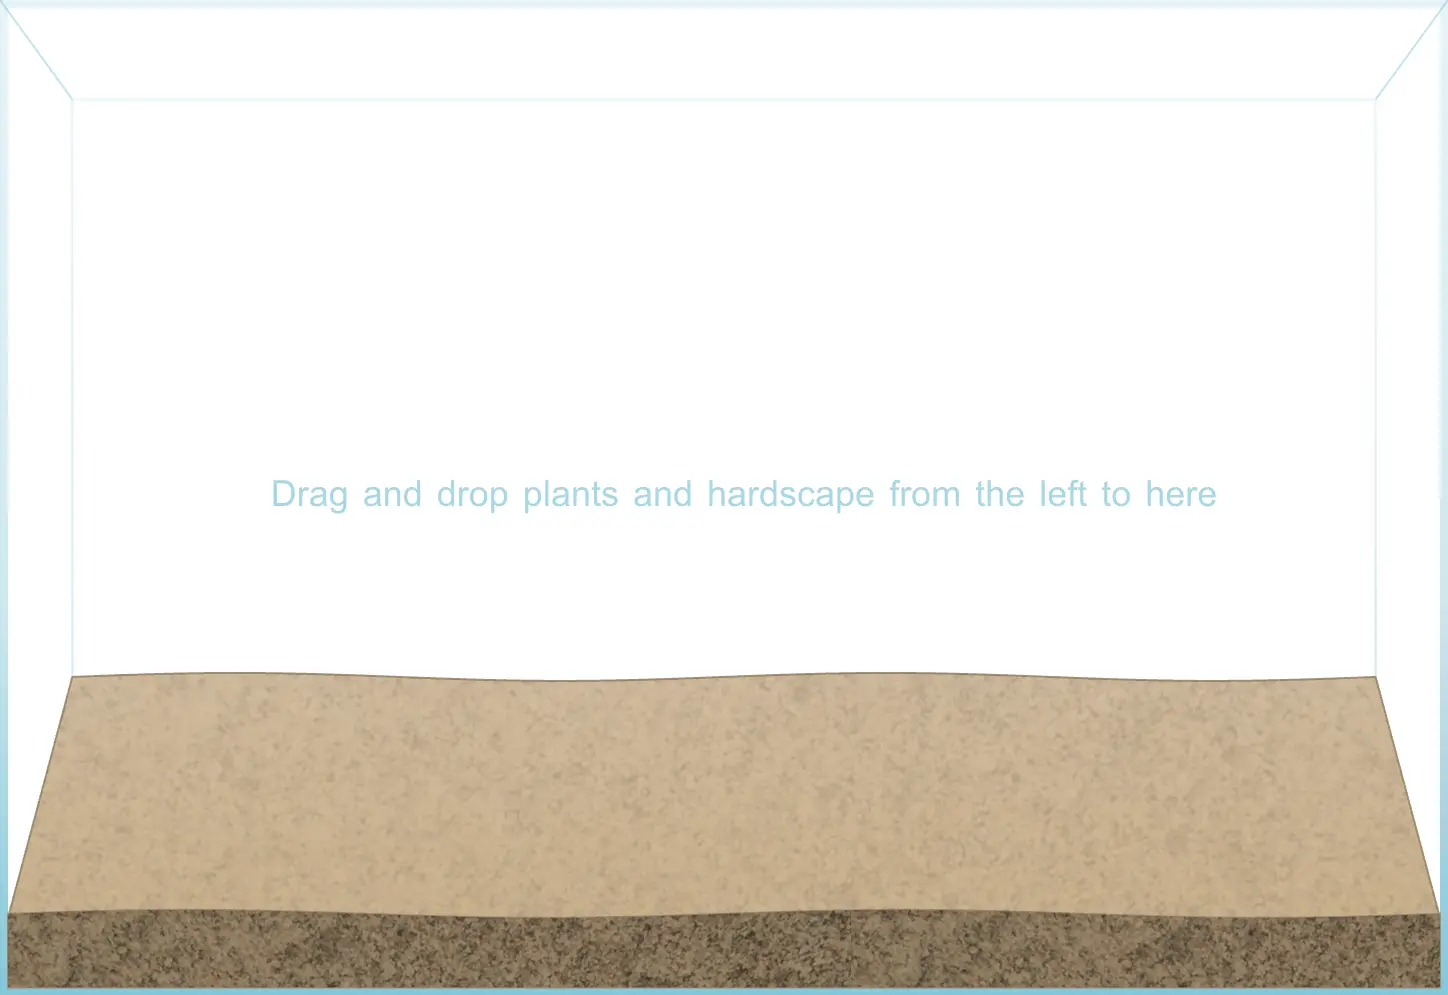
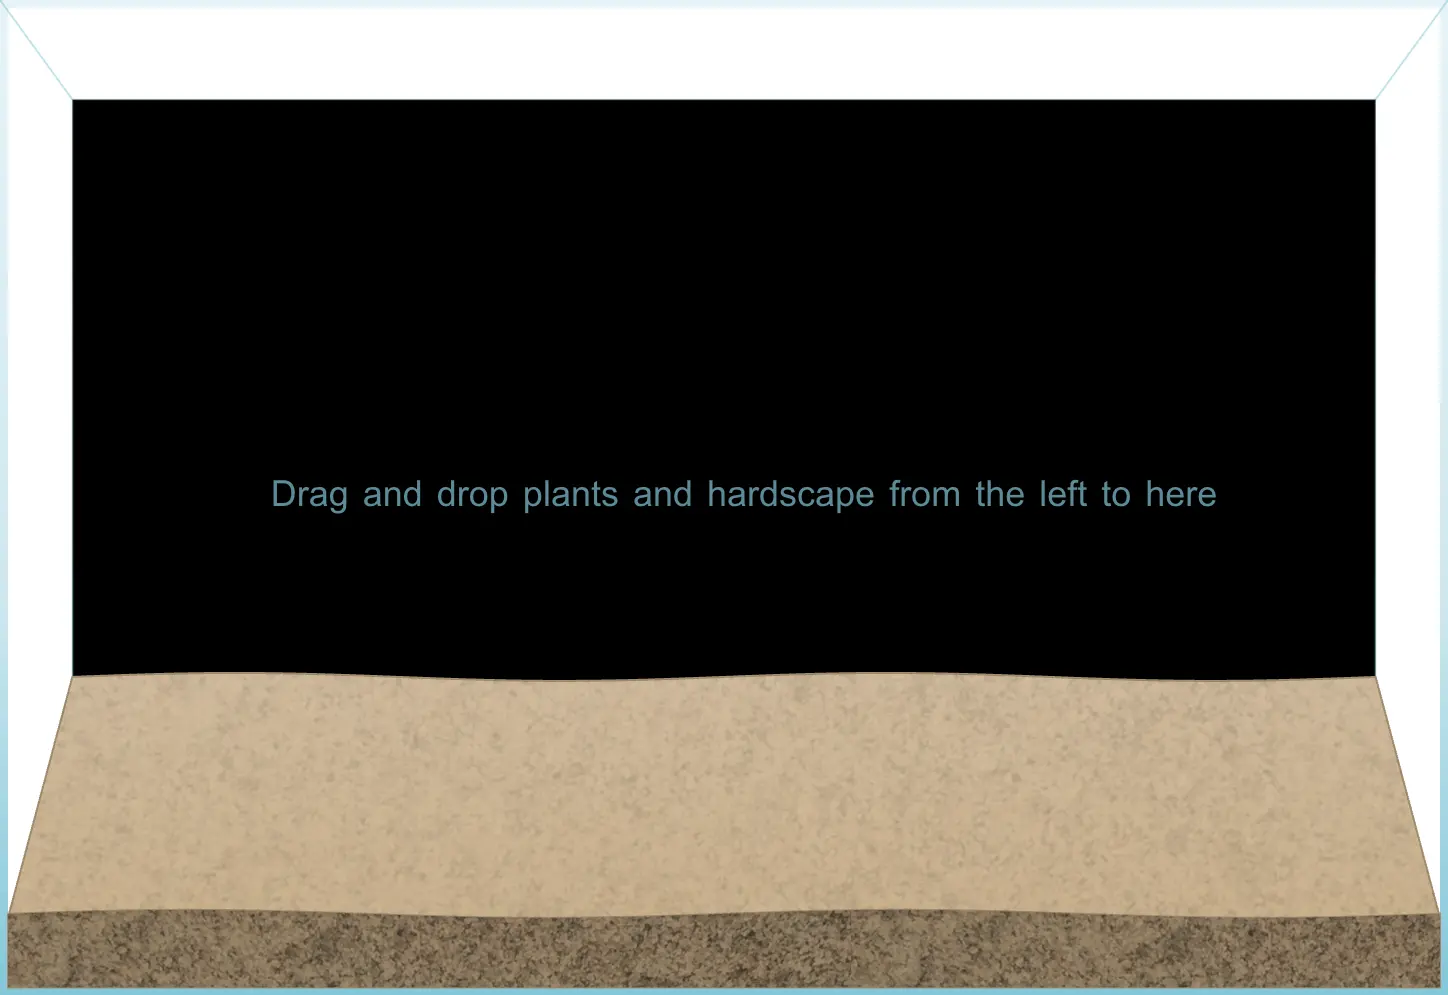
An all-in-one tool for designing and planning your aquarium.
Use the drag-and-drop designer to arrange plants and rocks without getting your hands wet—your progress is saved automatically.
When the layout’s ready, choose from more than 650 aquarium products to complete the build.
Why water flow belongs in the design phase
If you’ve made it this far, pause and jump back to your sketch for a second. Flow isn’t a bolt-on extra you fix once the tank is wet—it should shape where every rock and branch goes from the start.
- Aim the filter’s output (the nozzle that returns clean water) along the longest side of the tank, so the current completes a lazy circuit before it’s drawn back up.
- Carve a hidden pathway behind tall hardscape. Even a two-centimeter gap lets water slip round the back and stops debris piling up.
- Soften the jet with wood or stone. Tilt a branch into the stream to spread it out; your foreground plants will sway instead of flattening.
- If you're unsure, run a dye test. A quick squirt of food coloring traces the current; if it hangs in one corner, nudge your layout now while everything is still movable.
Get the flow right, and future maintenance turns into a five-minute tidy—not a weekly treasure hunt for gunk.
What to do on the day
You’ve nailed the design and gathered your supplies.
Important: Don’t buy the fish yet! There are plenty of beginner mistakes to avoid while setting up, and this is a big one.
1. Place substrate
Slope your sand or soil gently upwards toward the back. It adds depth and gives larger background plants more room for their roots.
2. Start with the hardscape
Before adding water or plants, position your hardscape.
I often lay everything out on a towel-covered table first—ideal for gluing loose pieces together. When satisfied, lower them carefully into the tank.
3. Fill with some water
Add enough water to dampen or slightly submerge the substrate. Plants settle faster, and they’re less likely to pop loose when you fill the tank later.
4. Plant your plants
The fun part! Work from front to back, starting with the smallest plants. Take your time and anchor each one firmly.
Aquarium Co-op’s tutorial is an excellent demo: watch it on YouTube.
5. Set up the rest of your aquarium
With the layout complete, install the remaining equipment. Our simple checklist walks you through it.
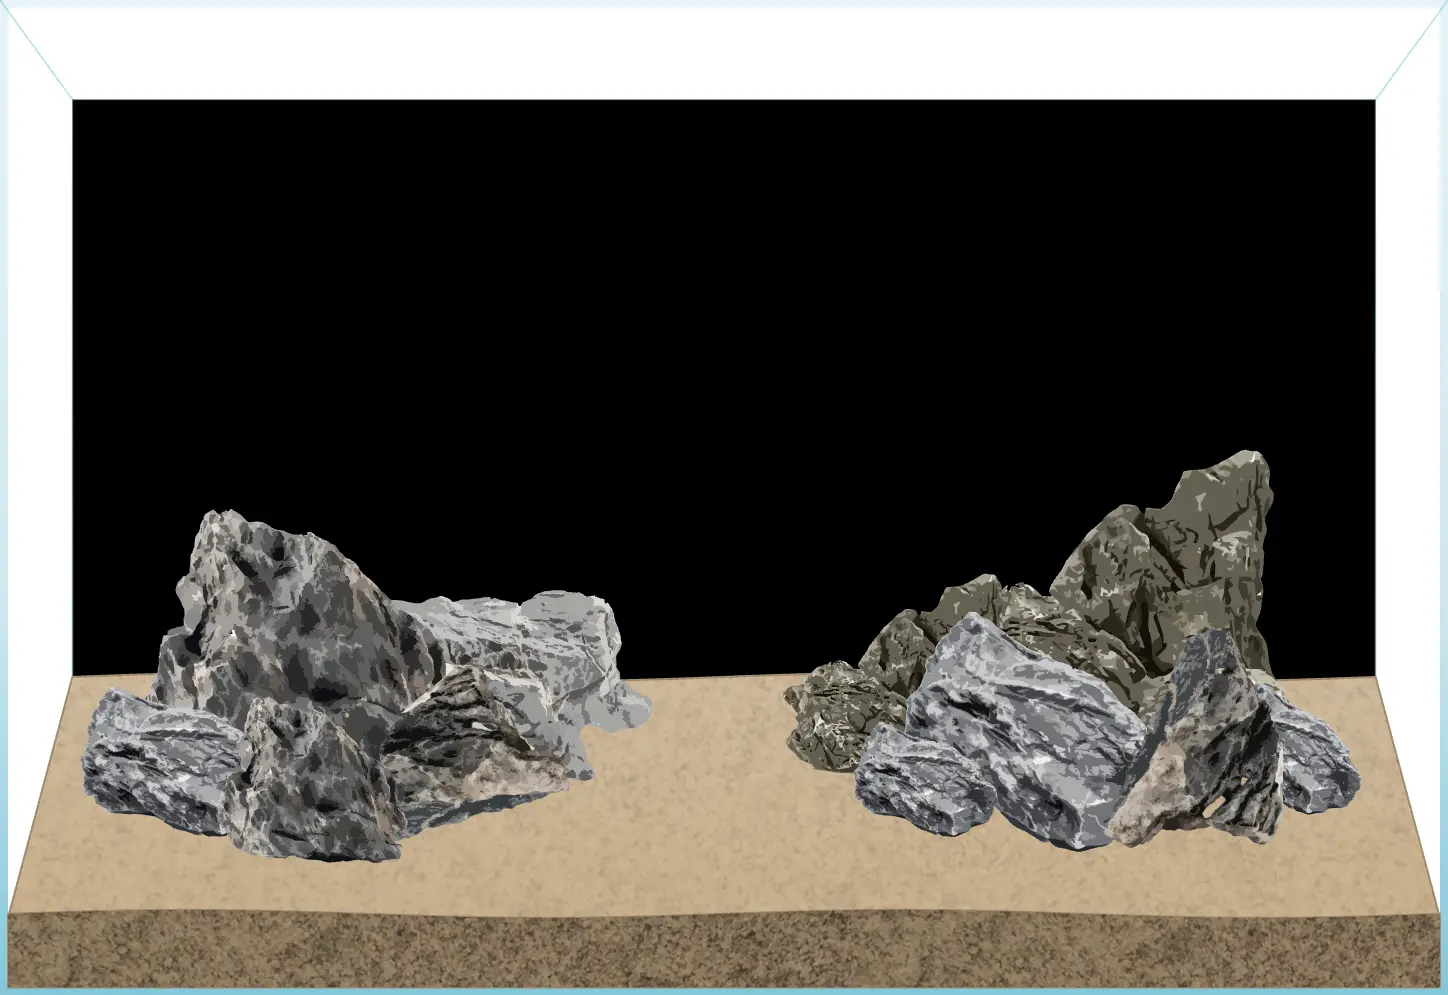
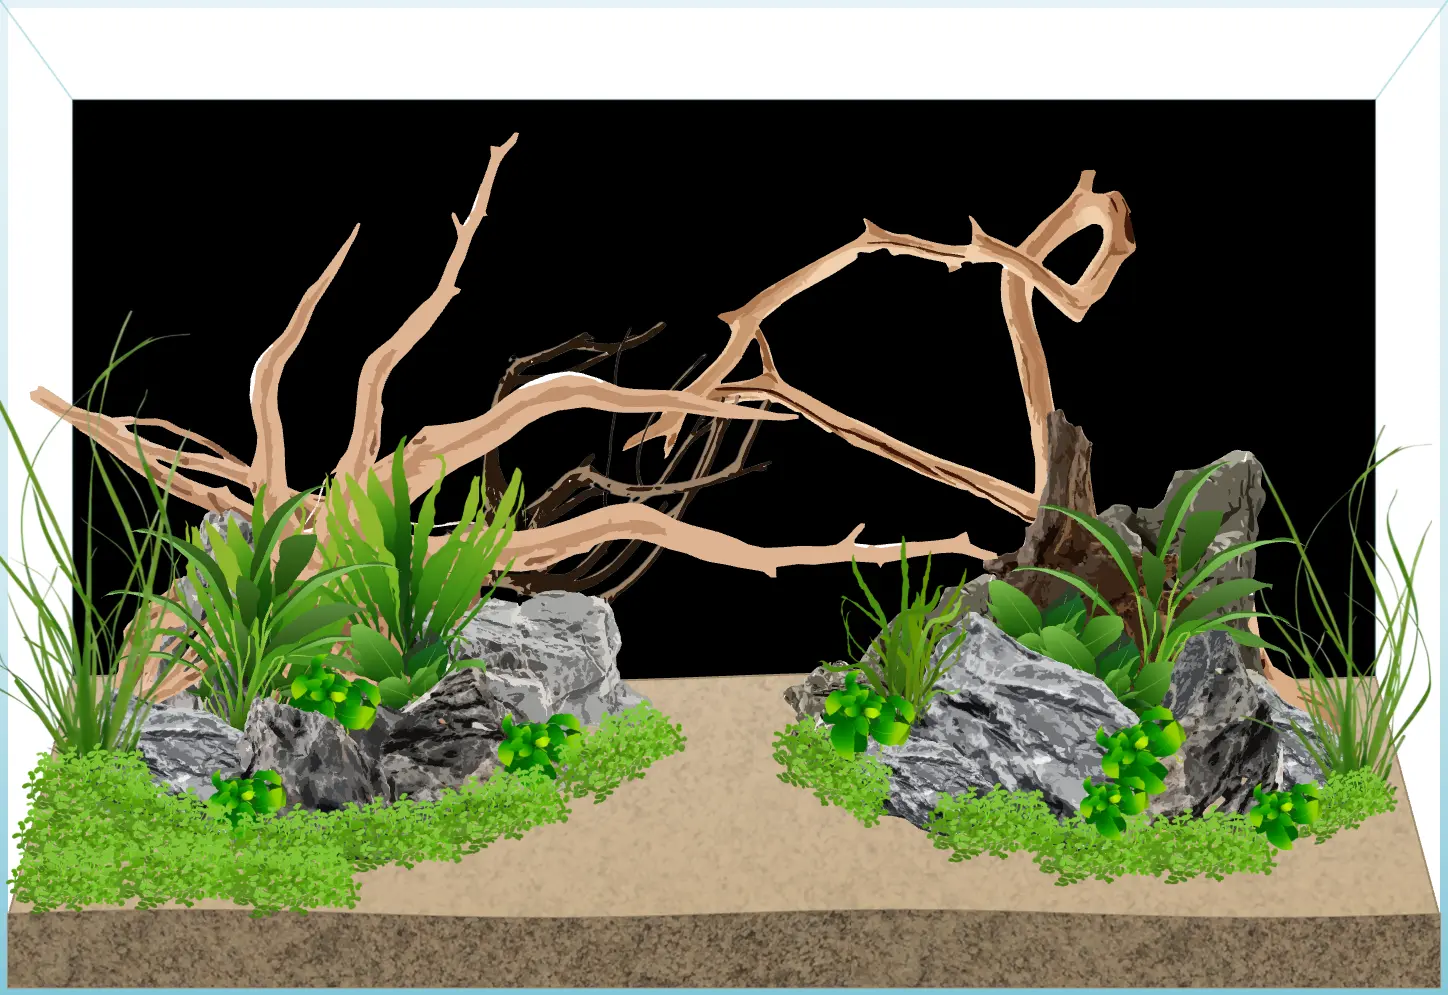
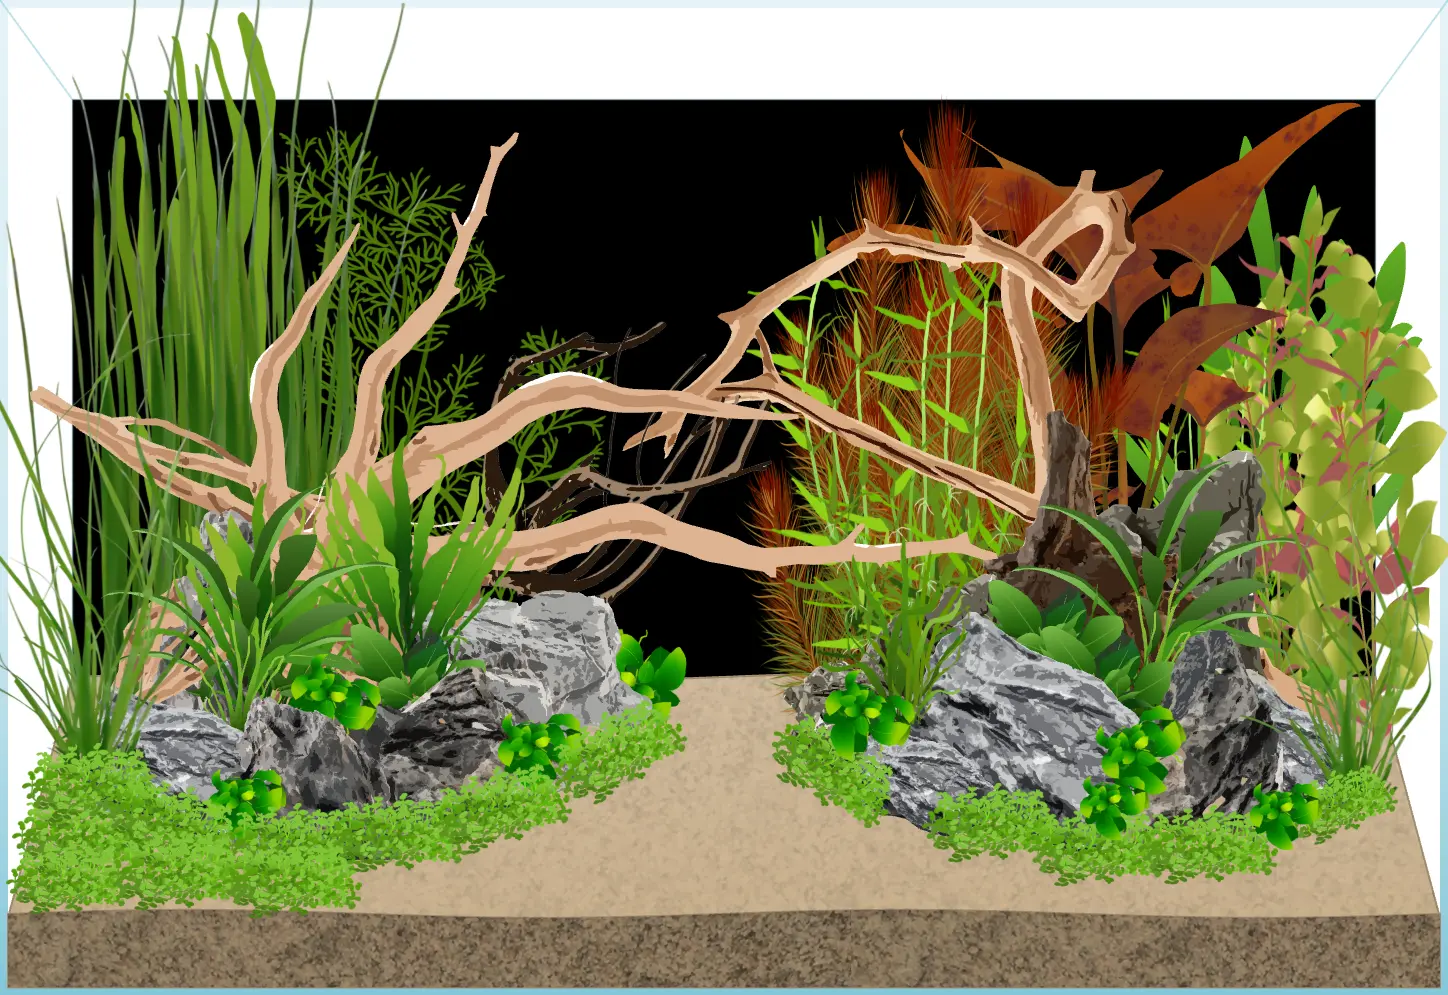
Step-by-Step Aquarium Setup Example
Here is a picture guide using MyAquariumBuilder to plan an aquarium. This design is called the Two Islands—you can check it out in the aquarium gallery.
1. Add your substrate
Spread an even layer across the whole tank, about 1–2 inches thick. Slope it up towards the back for a bit of depth.
Helpful tip: Use a credit card to get a smooth surface if you don’t want to buy any extra tools.
2. Stick on your background
It’s easiest to add the background now, before the tank gets heavy and hard to move. Try to pick a color that contrasts with your substrate.
3. Place your rocks
I’ve gone for two focal points here—one on the left, one on the right (that’s the Two Islands). This leaves a nice open area in the middle and gives your fish space to swim.
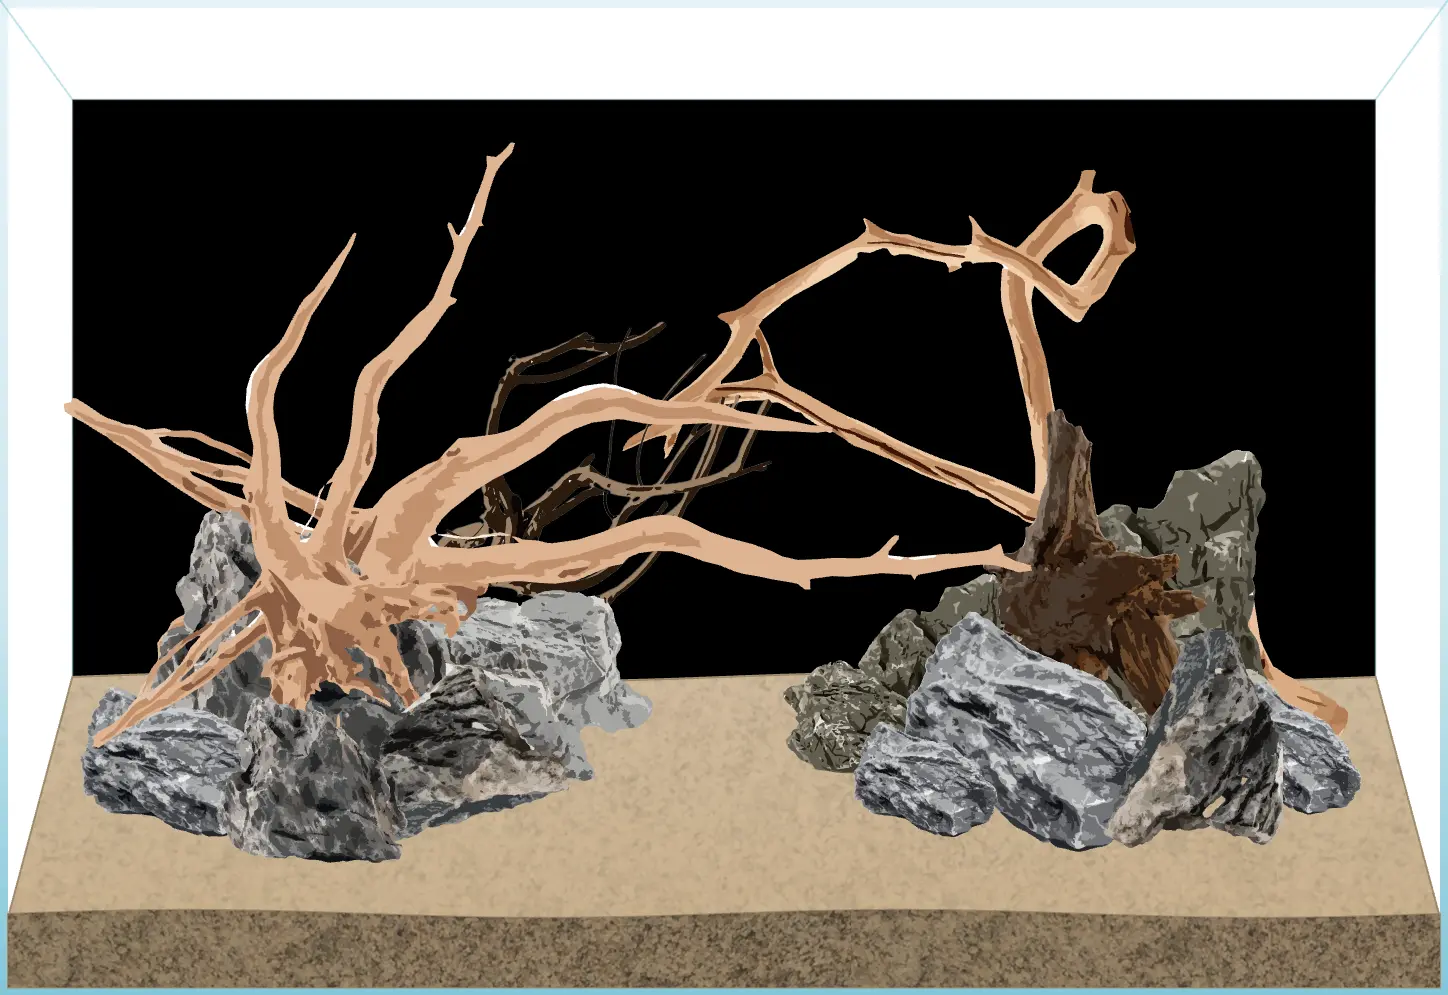
4. Add your wood
Wedge your wood in between the rocks. I just use the crevices in the rocks to hold the wood in place.
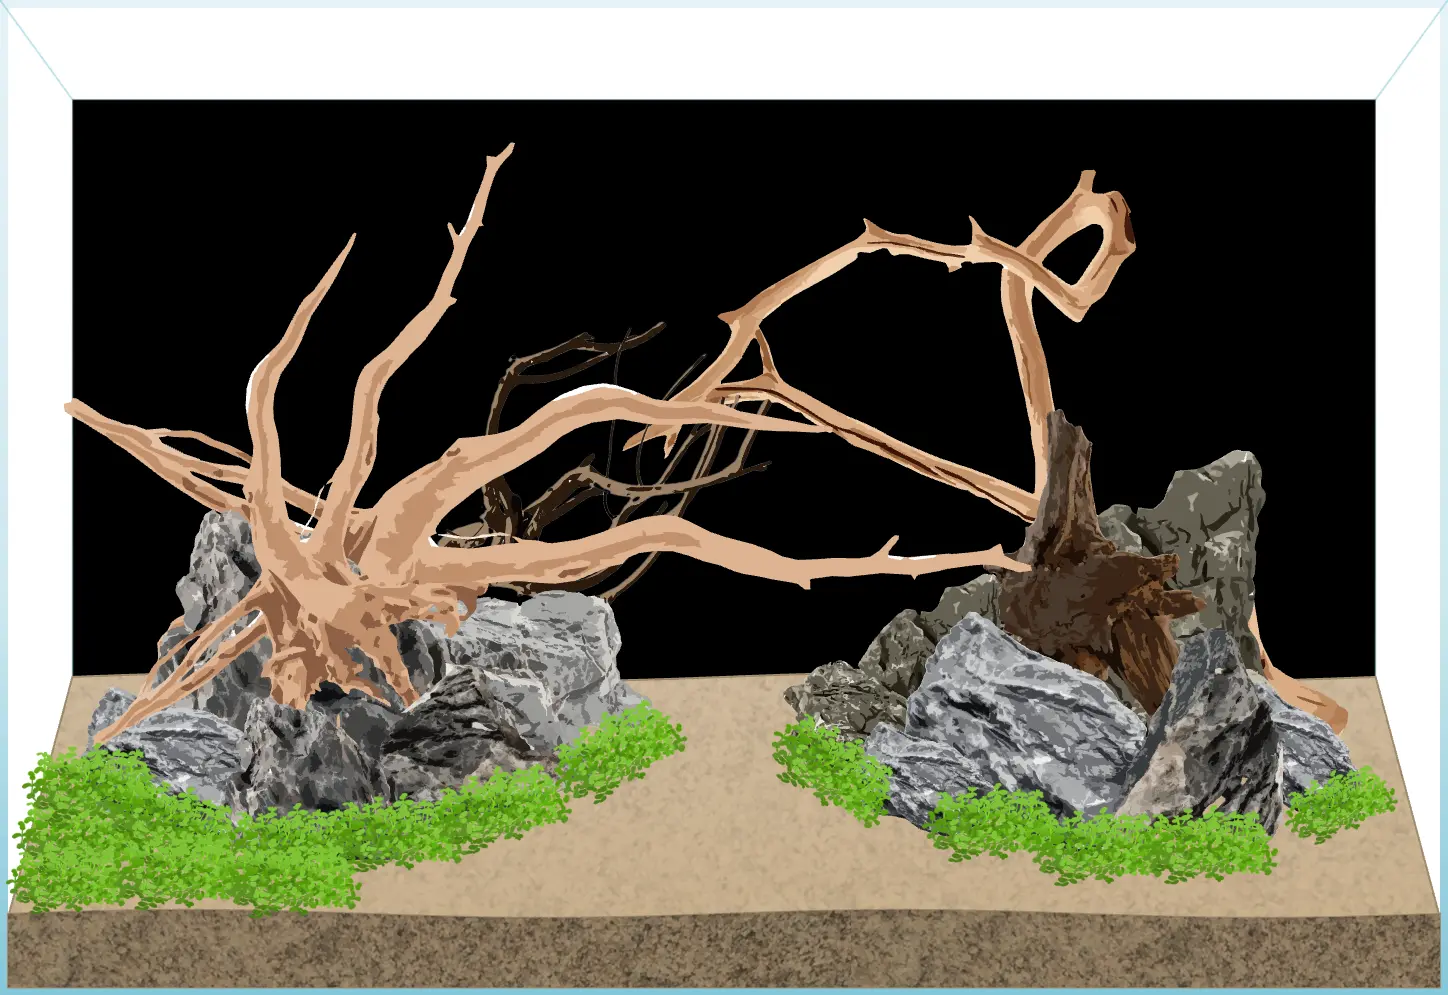
5. Add carpeting plants
These are your small plants that’ll slowly spread out across the tank. I’ve left some open space here so the “islands” really stand out, but you can do a full carpet if you want.
Example: Monte Carlo
6. Add your mid-sized plants
Add these across the middle of the tank. You can tuck them into the rocks, but if they need to be in substrate, make sure their roots get there.
Examples:
7. Add your tall plants at the back
Tall plants go at the back for depth. Plant them nice and deep.
Tip: You might want to add some root tabs to help these bigger plants grow.
Examples:
8. Add moss or epiphytes to the hardscape
Stick a bit of moss or any epiphytes onto the wood and rocks for a natural touch.
Examples:
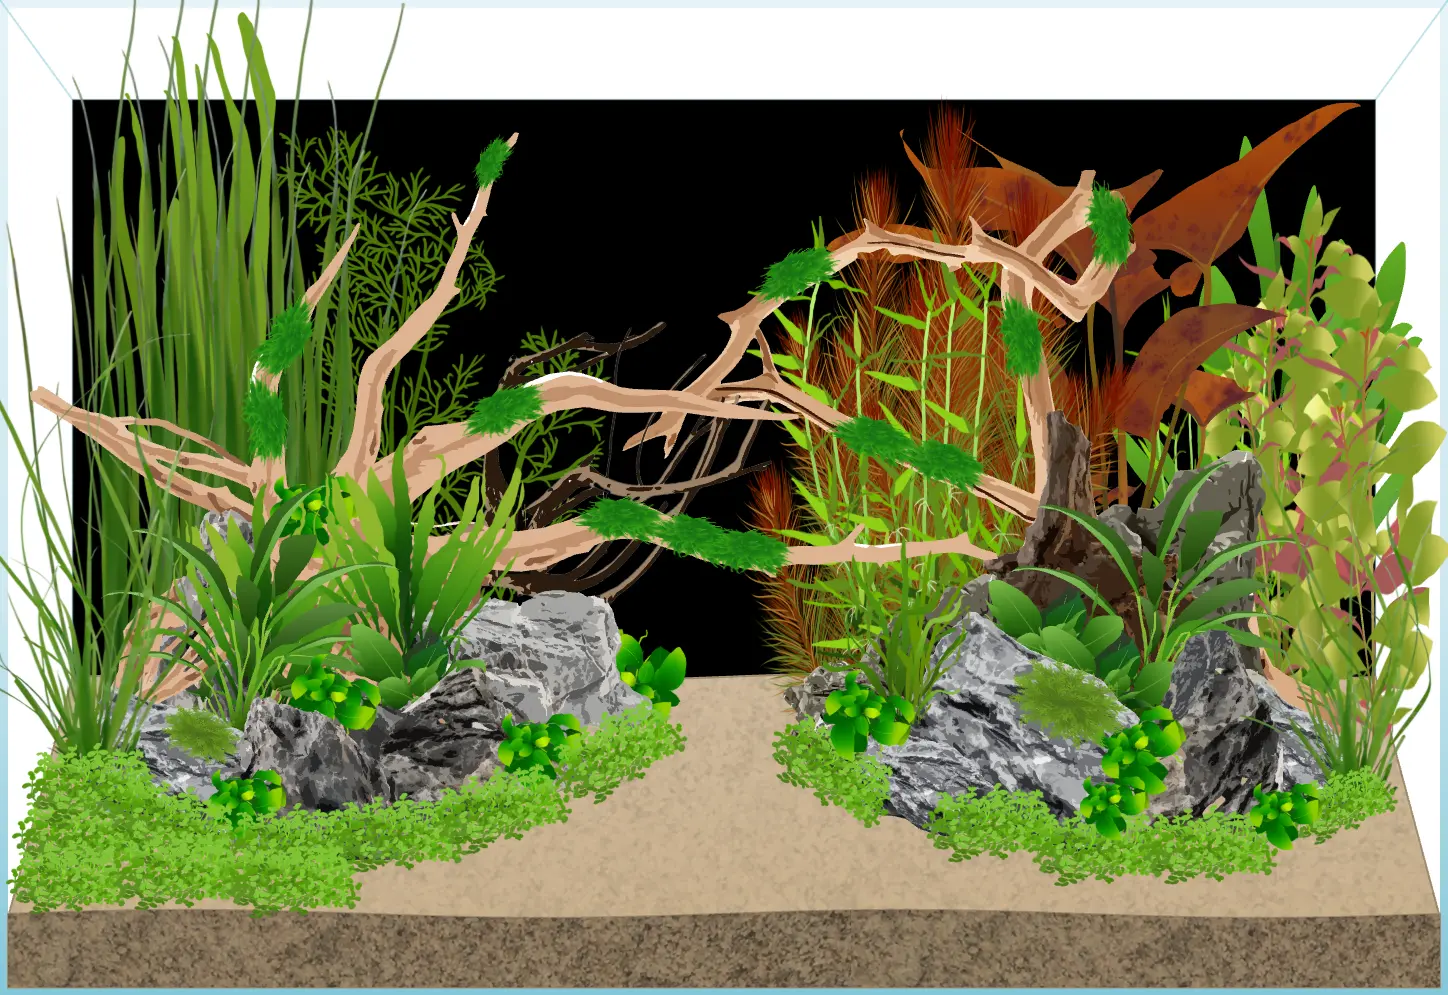
That’s it for the Two Islands setup. Simple and clean! You can check out the full build here.
Still need a bit of inspiration?
See what other users have created in the aquarium gallery.
How to keep your fish tank looking great
An aquarium isn’t a one-and-done project—you need to care for fish and plants to keep the ecosystem healthy. Read our guide on tank maintenance for the essentials.
What is aquascaping?
Aquascaping is the art of designing an aquarium with rocks and plants. It’s a niche hobby, but if you’d like a deeper dive into the many styles and techniques, see our comprehensive guide.
Think you’re ready to design your aquarium? Start here: build your aquarium